Visualizing Databricks dashboards in Tableau
In this article I will describe the steps to set up a notebook that exports a Databricks dashboard as an HTML file and uploads it to an S3 bucket configured for static website hosting. In Tableau, we will create a dashboard that will embed the URL where the file is located.

Notebooks and Data Visualization Tools
Notebooks and data visualization tools are important components of an enterprise data framework. Notebooks are mainly used by data scientists for exploratory data analysis, statistical modeling and machine learning. Specialized data visualization tools such as Tableau focus on providing users with a platform to quickly build interactive reports and dashboards with almost no technical background.
In general, when there are new questions raised by business users which require data exploration and fast feedback, notebooks are very helpful because of their flexibility and speed to try out different paths and provide insights quickly. Even though notebooks could be exported in a friendly format and shared, many users prefer to use their enterprise standard visualization tool as an entry point to all reports and dashboards.
There are also cases where specialized visualization tools do not have the capability to build advanced customized graphs. In my particular situation, I needed to build an interactive network graph with nodes and edges that were constantly being updated. After some research I found that I could use a Javascript library called D3.js which have powerful visualization capabilities. In addition, Databricks allows to embed D3.js visualizations in its notebooks, so one can integrate it with the rest of the data pipeline.
There are two steps in the process: first to build the Databricks dashboard that will contain the different graphs, and then to export this so that it can be accessed from Tableau. Even though the first step of generating the network graph with D3.js is really fun, in this article I will focus on the second step.
Running the notebook
First we need to run the notebook that have the visualizations for the dashboard we want to use. We will use the run_id of the executed notebook to export the dashboard.
When this notebook runs, it will store the run_id in a global temporary table. This is done by including the following snippet:
The run_id is then extracted from the previously created view, along with the name of the notebook. A new global temporary view will be created with the name: run_id_notebook-name
Exporting the Databricks notebook
In a separate notebook (let’s call it network_graph_export), we will run the notebook and get the run_id after it is executed.
We define a method that will use the previously obtained run_id and the Databricks REST API to export the Dashboard in JSON format.
The ACCOUNT in the DOMAIN variables should be replaced by your own Databricks account name. The API requires a token for authentication. This personal token can be generated in the Databricks UI or via the REST API.
The token is stored in what is called a Databricks secret. This utility can store any sort of credentials outside notebooks so that they can be retrieved when needed.
Uploading the exported file to an S3 bucket
To be able to upload the files to the S3 bucket that is configured to host static webpages, we first retrieve the access and secret keys using Databricks secrets utility. The upload_to_s3 method takes the file name and actual content as parameters and creates a new file in the DBFS file store. Then, this file is uploaded to the previously defined S3 bucket.
Running the export and upload
The JSON response that we get from the export_notebook method includes all views (dashboards) related to the notebook that we executed. There, we can choose to upload to S3 as many dashboards as we need (stored in the dashboards dictionary) but in this example I’m only choosing to upload one.
Embedding the Databricks dashboard in Tableau
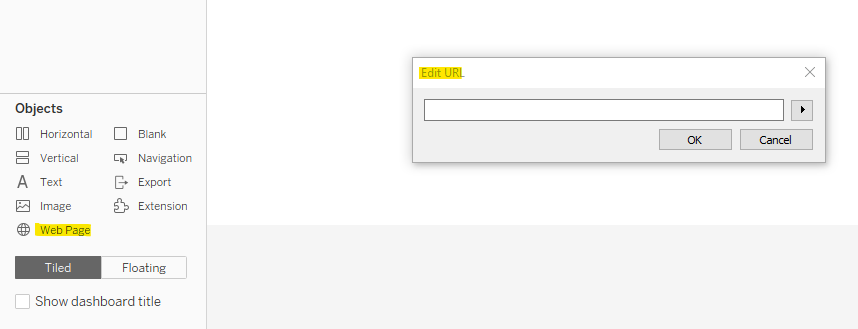
Finally, now that the dashboard is uploaded to S3 as an HTML static file, we will use the corresponding URL to visualize it in a Tableau dashboard. To do this, we just have to create a new dashboard and drag the Web Page object to the canvas. This will open a dialog box where you need to type the URL of the HTML file located in the S3 web hosting.

And that’s it!
Now, the Tableau dashboard will point to the URL where the exported Databricks notebook is located. If this needs to be updated frequently, you can set up a job that recreates the file from the Databricks notebook and replace the previous file in the S3 bucket with the new one.
